iPhone XS Max Screen Replacement


Step 1 - Before You Start
- Discharge the phone battery to below 25% before you start disassembling. - Turn off your phone. - Remove the SIM tray.
Caution:
- Take adequate measures and precautions in case the battery is swollen. - Do not heat the device. - Wear protection for eyes and hands.
Tip:
- If the display glass is broken, keep further breakage contained by taping over the glass - Lay overlapping strips of clear self-adhesive tape over the display.


Step 2 - Opening Process
Back to top
- Remove the SIM card tray. - Remove the two pentalobe screws at the bottom edge of the iPhone. - Apply heat gun or hairdryer to the lower edge of the iPhone for about a minute. - Insert the opening tool between the display and the frame. - Slowly progress along the edges. - Open the iPhone by lifting the display up from the left side, like a book. - Don't try to separete the display yet, several cables is still connected to the phone's logic board. - Opening the phone's display will jeopardize its waterproof features. - Make sure you have prepared replacement seals before you go on with the repair.


Step 3 - Disconnect LCD Display And Battery
Back to top
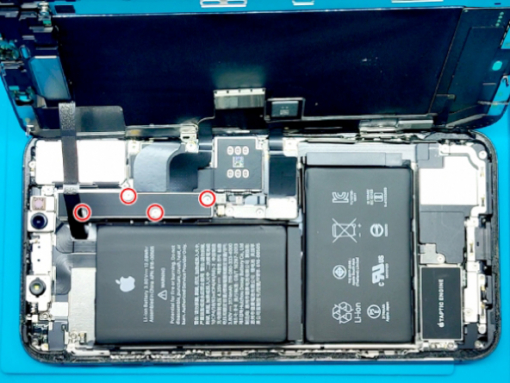
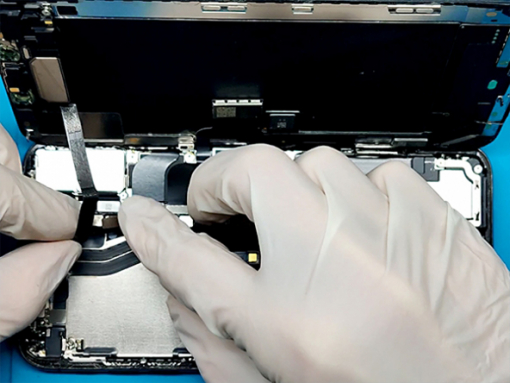
- Remove the screws securing the logic board cover bracket and remove the bracket. - Remove the screws securing the display connector bracket and remove the bracket. - Carefully use a spudger or a tweezer to disconnect the LED panel connector, and pry the digitizer cable connector up from its socket. - Lift the cable until he separates. - Lift up the display. Tip: - Avoid damaging your iPhone by keeping track of each screw's position and putting them back where they came from.


Step 4 - Disconnect Earpiece Spreaker And Front Sensor Assembly
Back to top
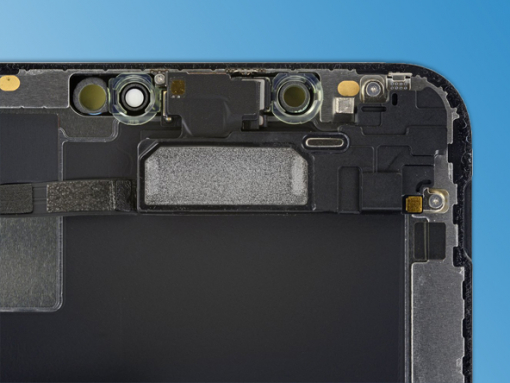
-Remove the screws securing the speaker and sensor. -Gently lift up speaket and sensor. -Take action slowly. The flex cables are fragile. -Use tweezers to lift the light sensor up from it's notch in the display.


Step 5 - Install The Ear Speaker Onto The New Screen
Back to top
-Pin the light sensor to it's notch in the display. -Again, watch out for the frigle flex cables. -Flip over the speaker. - Secure the speaker with the screws.


Step 6 - Connect New Screen To Motherboard
Back to top
- Connect all the plugs back. - The battery plug is the last one to connect! -Turn on the phone. -Test the new screen. -Turn off the phone. -Again, unplug all the connectors. -Remove the original seal and apply the new one. -Connect all the plugs back, making sure that the battery plug is the last one. -Secure the bracket to their place. -Connect the front and the back of the phone. -Press around the edges, all the clips should click-in-place.


